Good Morning Dreamer'z!!
Today I am up on the Kat Scrappiness Design Team Blog as a Guest Designer. I have been a long time customer of all things Kat Scrappiness as her fast shipping and great prices keep me coming back. So when Kat herself asked me if I would like to be a Guest on her Design Team of course I had to say yes!!
So during the month of April I will be posting a few different projects using her exclusive product along with products you can easily shop for on her website.
Card #1
Card #2
Today's cards use the new Crafters Essentials Easter Edition Dies along with a few other Dies from her exclusive line. I will be sure to add links to the items in the card recipe below.
Diecut a couple bunnies
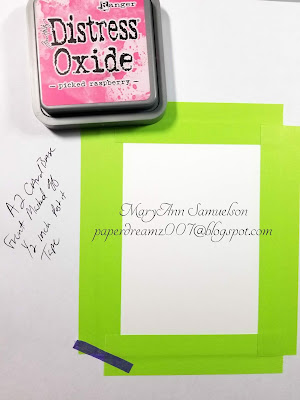
Create a couple of masked off panels using post it note tape
- Grab your favorite blending tools and the ink of your choice. For these 2 cards I used Picked Raspberry Distress Oxide Ink and set about blending the bunnies from the bottom up just place the bunnies on the panel any way you wish and give it a light blend around the edge of the die cut. Honestly there is no wrong way here, just go with it!
- For card #1, I masked off the ink blended bunnies and applied a splatter of Picked Raspberry Distress Ink and some Black Shimmer watercolor from my stash. when the panel was dry I used Stitched Fancy Scalloped Rectangle Die centered over the panel to give it a fancy and flirty look. A piece of Gina K Designs Passionate Pink paper and Gina K Designs Black Onyx paper were cut down and used as layers beneath the bunny blended panel. All panels were attached atop a top folding A2 sized card base of Neenah 110lb Classic Crest Cardstock I used Nuvo Deluxe Adhesive for all my adhesive on my cards today. I like how it did not cause any warping and gave me just enough time to position the panels all in place
- For card #2 all steps are the exact same except I masked this panel to allow for a bigger pattern. I used the largest of the Stitched Fancy Scalloped Rectangle Die to cut the panel, and again to cut a panel from the Gina K Black Onyx paper which I used as a frame, I diecut a rectangle from the center of it. I glued the black onyx frame to the top of the blended bunny panel and then affixed it to the top of a side folding A2 sized card base of Gina K Designs Passionate Pink cardstock. I still felt the card needed something so I grabbed a simple script Happy Easter sentiment stamp from my stash and stamped it with Versamark embossing ink and used a pale pink embossing powder on a scrap piece of Black Onyx paper, applied a strip of double sided foam tape and affixed to bottom of panel as shown.
~
That is all for me today. I hope I have inspired you to maybe give this technique a go and create some fast and easy cards.
~
Thank you for stopping by for a few minutes!
MaryAnn
~
For more inspiration, updates, and news make sure to check out these places:
Kat Scrappiness Blog
Stamping Enablers
~
Thank you for stopping by for a few minutes!
MaryAnn
~
For more inspiration, updates, and news make sure to check out these places:
Kat Scrappiness Blog
Stamping Enablers


They are both so pretty! I love the bunny and the technique! Have a wonderful day!
ReplyDeleteTheresa
Congrats on your GD spot!!Such a beautiful card!!I love the cute bunny background. Great technique!
ReplyDeleteHave a wonderful day,
Migdalia
I would love for you to follow me over at my NEW blog...
Migdalia's Crafts